Connect and enrol your macOS computers onto the Trinity network For computers that have previously been logged in to
The following information is applicable to staff and postgraduates who are already logged into a macOS computer and would like to connect and enrol the computer onto the Trinity wired network.
The steps are also relevant for staff connecting and enrolling a computer onto the Staff Wi-Fi network. For postgraduates looking to connect a computer to the Student Wi-Fi network only, please see our Student Wi-Fi guides instead.
If you are looking for the steps to connect and enrol a brand-new computer, that has never been started up, follow these steps instead.
If you are logged in to a macOS computer and would like to connect and enrol it onto the Trinity network, there are two stages that you must complete:
- Apply to connect the new computer to the network
- If you have been directed back to this webpage from the IT Services network request response email, then you have already completed this step
- Connect and enrol your computer onto the network
- This needs to be done from the computer using the below steps
Connection and enrolment steps
Once you receive the email from IT Services in response to your network request application, you can now complete the below steps on your new computer.
As part of these steps you will enrol your computer with Microsoft Intune so that it can be managed by IT Services for a range of security settings including operating system updates, encryption and anti-virus.
Enrolling your computer with Microsoft Intune is a strict requirement for any device connecting to the main wired network, Staff Wi-Fi or Staff VPN.
Before proceeding with the below steps, please ensure FileVault encryption is turned off.
How to turn off FileVault on a Mac
Once you complete the enrolment steps, FileVault will be switched back on automatically.
- Ensure your computer has an internet connection. Your options would be to connect to one of the below networks:
Once you connect an ethernet cable from your computer to a live network point in an office or lab, the wired network will automatically connect.
If you also plan to use the Staff Wi-Fi service, you can configure this connection at a later point.
To connect to the Staff Wi-Fi network, complete the following steps:
- On the menu bar, click Wi-Fi icon and make sure the Wi-Fi toggle is in the 'on' position

- Click Other Networks

- Scroll to the bottom of the list and click Other

- In the Find and join a Wi-Fi network box, fill in the following values and click Join:
- Network Name: TCDwireless
- Security: WPA2 Enterprise
- Username: Enter your Trinity computer account username
- Password: Enter your Trinity network login password
- Tick the Remember this network check box

Note: You may receive several prompts after joining the TCDwireless network:
- If you get a message referring to 802.1X Authentication - enter your College username and Network Login password and click OK.
- You may get a further prompt to Verify Certificate - choose to Show Certificate and select the box beside Always trust "TCDwlan" before clicking Continue.
- If a further prompt appears relating to eaptlstrust then enter the Administrative username and password for your Mac, before clicking OK.
- If the 802.1X Authentication prompt appears again then enter your College username and network login password and click OK.
Connect to any personal Wi-Fi network such as your home Wi-Fi.
If you plan to come on campus at a later point and use the:
- Staff Wi-Fi service, you will still need to configure this connection once you are on campus
- Wired network, simply connect a network cable from your computer to a live network point and you will be connected to the wired network automatically
- Sign in with your Trinity email address at https://portal.manage.microsoft.com
- You may be prompted to select 'Which type of device you are using?'. If so, select the appropriate device followed by the Select button
- On the 'You don't have any apps yet' page click the Devices button.
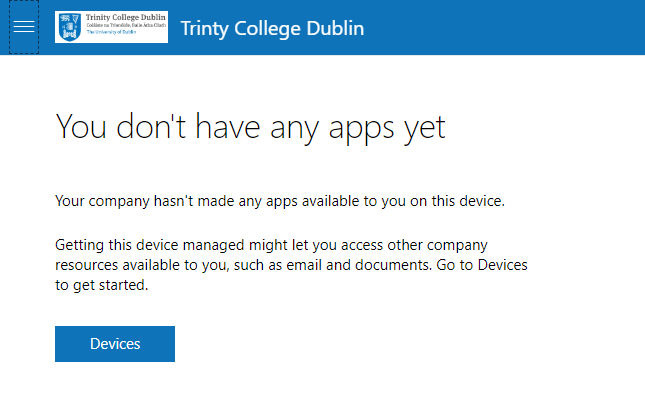
- Click on the grey notice under 'Devices'

- A popup will open. Click the Download button to install the Company Portal app.
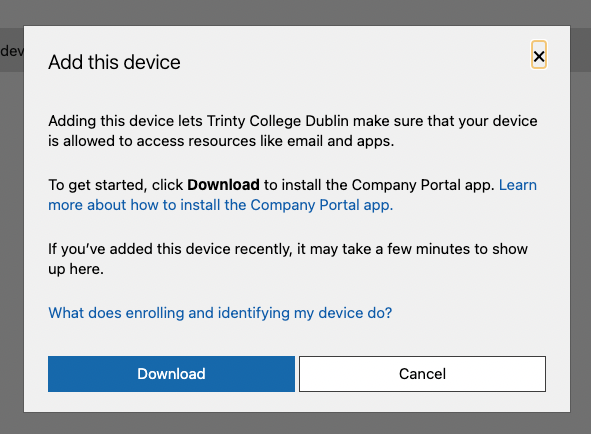
- If you have previously added a managed device, first select 'My device isn't listed here' followed by the Download button
- If you see the following window, click Allow to proceed.
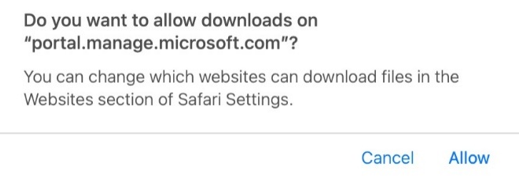
- Go to Downloads and open the Company Portal Installer app.
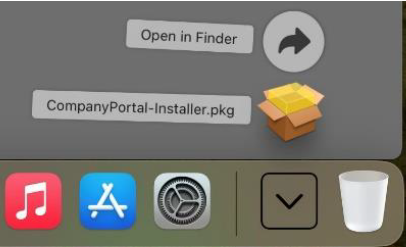
- Click through the steps to install the Company Portal app
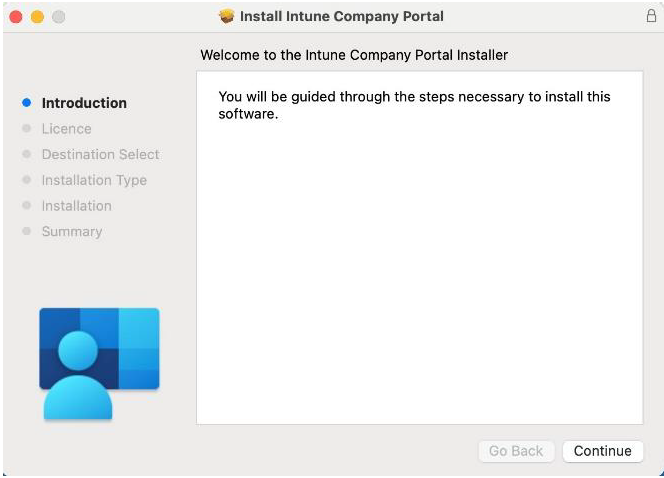
- Enter your "Mac administrator password" to proceed when prompted and click Install Software. When you see 'The installation was successful.' click the Close button
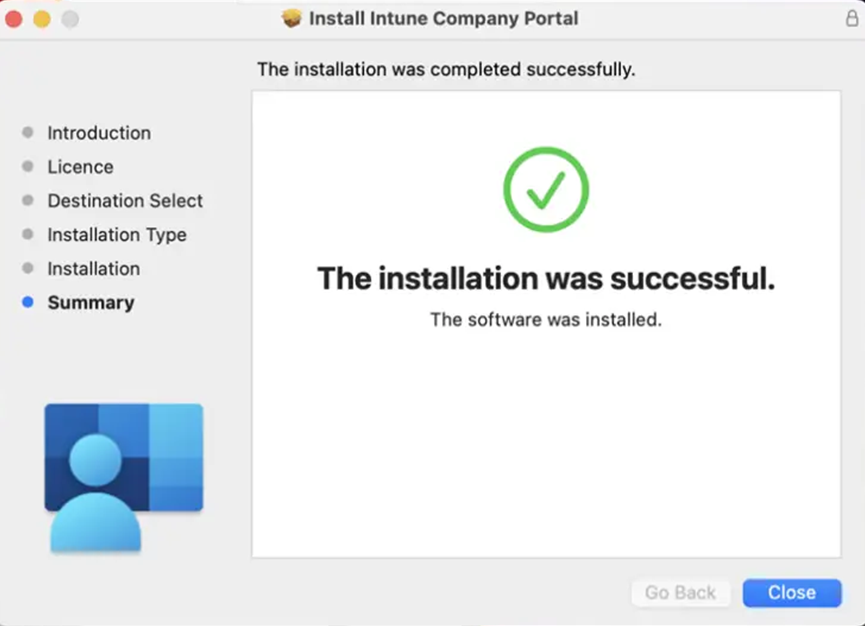
- The "Mac administrator password" is created when you set up the initial computer account on the machine
- Click Move to Bin to send the installer file to the Bin. If you see the 'Add this device window' you can click Cancel to close it. A 'Required Data Notice' window will appear, click the OK button to proceed
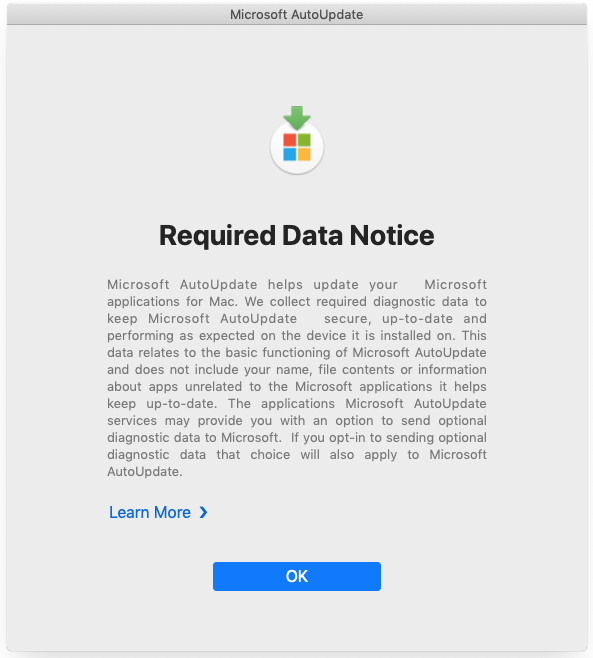
- If there are any available updates in 'Microsoft AutoUpdate' click the Update button

- Go to Applications and open the Company Portal app
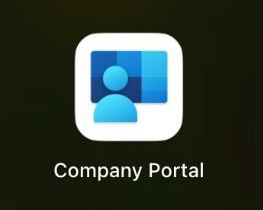
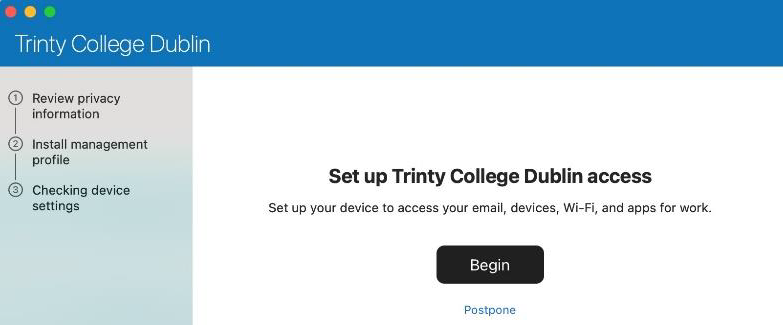
- Sign in with your Trinity email address. On the 'Set up Trinity College Dublin access' window click Begin
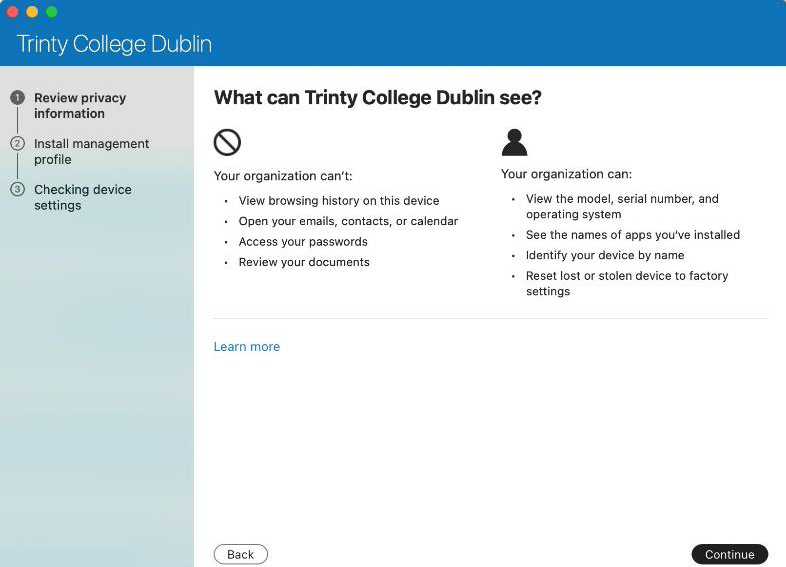
- On the 'What can Trinity College Dublin see?' window, click Continue
- On the 'Install management profile' window, click the Download profile button.

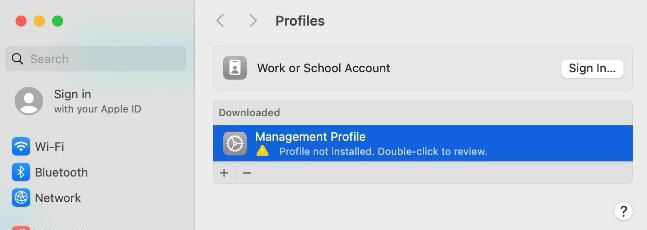
- System Settings will open and show the Profiles setting. Double-click on the Management Profile to review the information
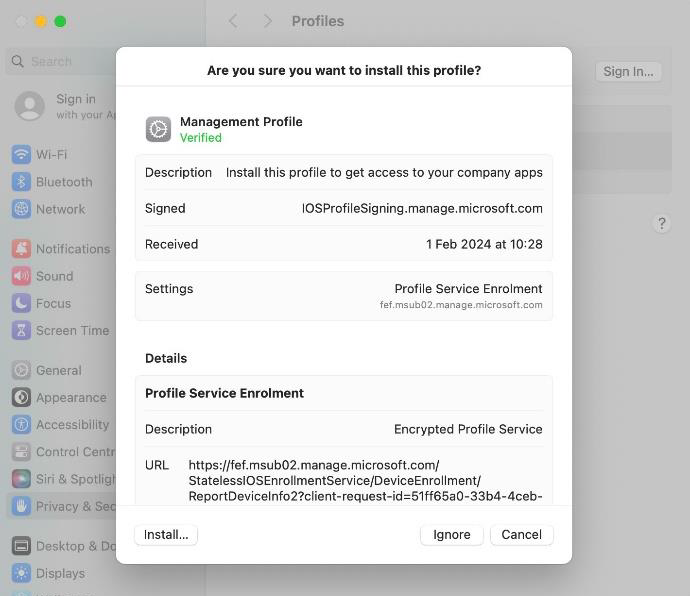
- An 'Are you sure you want to install this profile?' window will appear. Click the Install button in the bottom left
- Enter your computer password to proceed with the installation The required configuration profiles will appear and you will see a message saying 'This Mac is supervised and managed by: Trinity College Dublin.'

or

- You can now close System Settings and return to the Company Portal app
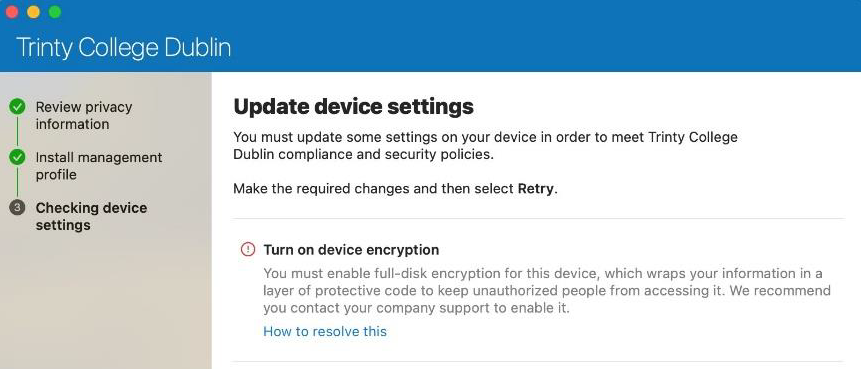
- If you see Turn on device encryption in the Update device settings window, log out of your computer account by clicking the Apple icon in the top left corner, then selecting Log Out

- When the window below appears, enter the "Mac administrator password" and click OK
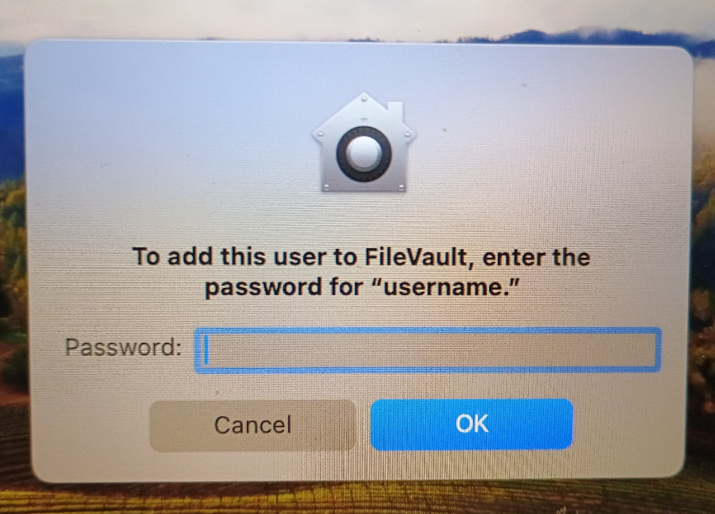
- After a moment, a window with a FileVault recovery key will appear. You can make a note of this now and/or take a photo of it. Do not share this recovery key with anyone
- You can also view your FileVault recovery key by signing into your Trinity account in the Company Portal at https://portal.manage.microsoft.com/
- If you see Turn on device encryption in the Update device settings window, log out of your computer account by clicking the Apple icon in the top left corner, then selecting Log Out
- Once logged back into the desktop, Microsoft Defender anti-virus will be installed and FileVault encryption will be enabled
To confirm your computer meets compliance requirements, sign back into the Company Portal app:
- If the status is Not compliant, click the three dots in a black circle to the right of your device name and click Check status
- When your device meets the compliance requirements the status will say In compliance
Next steps
Now that your computer is connected and enrolled on the Trinity network, IT Services will manage and deploy:
- Regular operating system updates
- Continuous, real-time anti-virus protection via Microsoft Defender
- Device encryption via FileVault
You can install Microsoft 365 software such as Word, Excel and PowerPoint by following the steps on our How to install Microsoft 365 Apps webpage.
You may also want to install popular internet browsers such as Google Chrome or Mozilla Firefox.
If you are a Staff member and plan to work off-campus, you can now apply for a VPN connection. This will allow you to remotely access Trinity network services which are usually restricted to those who are situated in their office on campus.
Should you need any further advice around installing software, please contact the IT Service Desk.

