Defining a site in Dreamweaver
This page gives information and instructions on how to configure Dreamweaver (by 'Defining a site') in order to publish to the Trinity Web Server.
To perform the tasks outlined, you will need a PC / Mac with an internet connection, a working Webauthor Account and a copy of Adobe Dreamweaver.
To make changes to a Trinity website, while working remotely, you must be connected to the college VPN.
In the below examples, we are showing how you would 'Define a site' to a website at tcd.ie/astronomy
To 'Define a site' for your own website, you would just assume 'astronomy' is replaced by the website folder you have access to (e.g. dental, biology, etc).
How to 'Define a site'
'Defining a Site' in Dreamweaver is a process that consists of the following:
- Setting your 'Site Name'
- Choosing where on your computer you are going to store your 'local' copy of the website
- Setting up the connection to the 'Web Server' using your webauthor credentials
'Defining a Site' in Dreamweaver only needs to be done once for each site you work with; however, you will need to edit your web server password settings each time you update this password.
The below steps will be the same for most versions of Dreamweaver. On some of the very old versions (CS4 and earlier), the sidebar label for 'Site' will say 'Local Info' and the sidebar label for 'Servers' will say 'Remote Info'. If you have trouble 'Defining a site' on older versions of Dreamweaver, please submit a support ticket to itservicedesk@tcd.ie
Create a 'New Site'
To begin the process, use the top toolbar menu and choose Site > New Site. This will bring up the 'Site Setup' screen:
Setting your 'Site Name' and 'Local Site Folder'
In the 'Site Setup' screen, add the following values:
- For 'Site Name', add the name of your site.
- For the 'Local Site Folder' input, use the folder icon to browse your computer and create a new folder. Select this newly created folder as your 'Local Site Folder'.
When creating your local site folder, it is good practice to create the folder using the same name as the folder on the web server. For example, if your website URL is www.tcd.ie/astronomy/, then create the folder as 'astronomy'.
Define the web server settings
The next step is to setup the web server connection.
Using the left-hand menu, select the second item called 'Servers'. Then click on the ‘+’ symbol to bring up a second window where you can enter the server information.
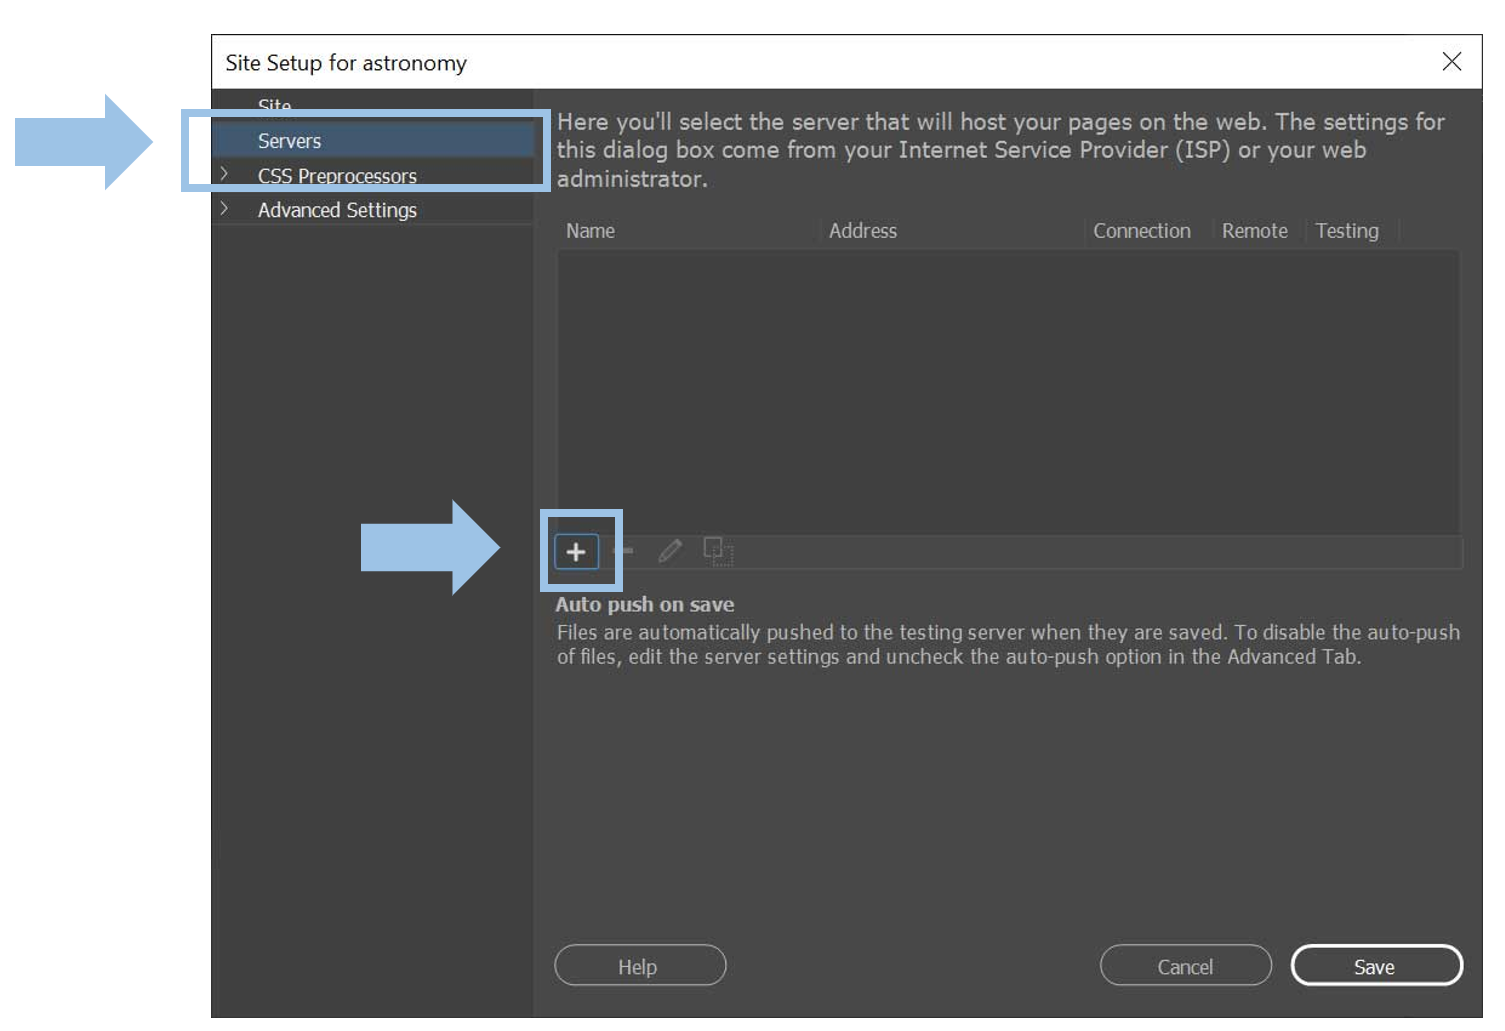
When the server information box opens it will look as follows:
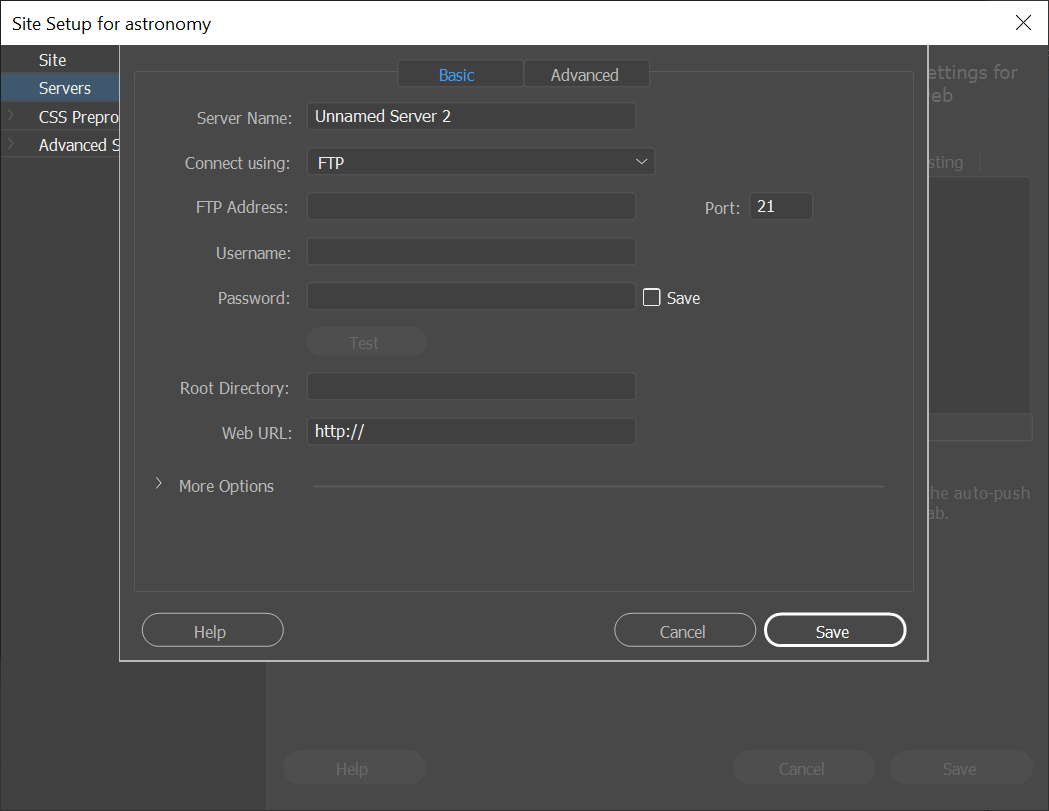
The Server information screen can be broken down into three parts.
- Server Definition
- Webauthor Credentials
- Server Access Pointers
Server Definition
The top section should contain the following values:
- Server Name: webpub.tcd.ie
- Connect using: SFTP
- SFTP Address: webpub.tcd.ie

Webauthor Credentials
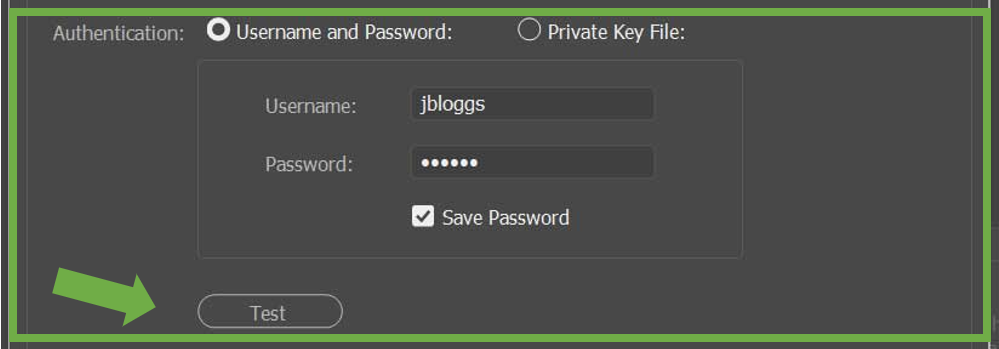
The middle section will be where you add your webauthor username and password. Make sure you enter your ‘username’ in all lowercase characters.
To verify that your credentials are working and correct, click on the ‘Test’ button.
If everything is working correctly, you will get a message to say you have connected successfully.
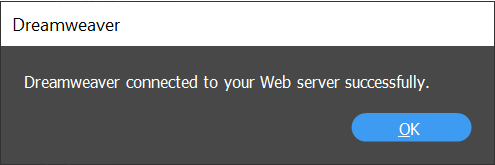
If you don’t get the above message, it is usually an issue with one of the following:
- You have entered your username incorrectly. Double check your username is all lowercase.
- The webauthor password you are entering is incorrect.
- Your webauthor password has expired and needs to be reset. See Webauthor Account - Password reset & Password expiry for more details.
- You do not have a webauthor account. See Webauthor Account - General information for more details.
- The Root Directory (see below) has been entered incorrectly.
- You are working remotely and need to connect to the college VPN.
Server Access Pointers
The bottom section indicates where on the server you want to access. For our example, we will be adding the following:
- Root Directory: /www.tcd.ie/astronomy/
- Web URL: https://www.tcd.ie/astronomy/

When you are working on your own site, then you would change these references to point to the tcd.ie site that you are the maintainer of.
Once you are happy with your settings, click ‘Save’ twice and then ‘Done’.
You have now 'Defined your site' and can download any files for the web server to your local machine.
Case sensitivity
Please note, the Root Directory and Web URL references are case sensitive.
The values you input must match the casing of the website URL. For example, if your website URL is https://www.tcd.ie/Economics/ where the 'E' in economics is capitalised, then the values you input would be:
- Root Directory: /www.tcd.ie/Economics/
- Web URL: https://www.tcd.ie/Economics/
and not:
- Root Directory: /www.tcd.ie/economics/
- Web URL: https://www.tcd.ie/economics/
Sub-domains
A site is considered a subdomain, if the website URL is in the format area.tcd.ie as opposed to www.tcd.ie/area.
If your website has a subdomain URL, then the access pointers will be in the format:
- Root Directory: /www.tcd.ie/area
- Web URL: https://area.tcd.ie/
and not:
- Root Directory: /area.tcd.ie/
- Web URL: https://area.tcd.ie/
Should you still have issues connecting to a subdomain site, please contact the IT Service desk for advice.
Further information
Download the full website
Now that you have 'Defined your site', you can download all or some of the files and folders from the web server.
To download the entire site, highlight your top-level folder in the 'Files' panel on the right of the screen.
Select the 'Down' (⇩) arrow to download all the website files and folders from the web server to your local folder.
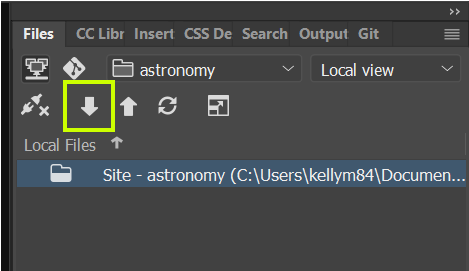
When you select the 'Down' (⇩) arrow on the top-level folder, you will be prompted with a message asking if you wish to get the entire site. Say 'Yes'.
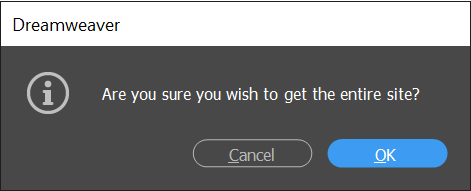
Please note, this may take some time to complete depending on the size of the website. If you need to make edits to just one page, you can just download that individual page instead. See Editing an existing page for more information.
In some versions of Dreamweaver, you may be asked if you would like to 'Put/Get dependent files' when uploading or downloading. If this happens, the best option is to tick the box 'Don’t show me this message again' and select No.
Previous: Dreamweaver purchase and installation

