Archive your email to a .pst/.olm file
The below are step-by-step instructions on how to archive your email to an offline .pst (Windows) or .olm (macOS) file.
You would use this if you are closing a generic mailbox and wish to keep a copy of the information. Or wish to keep a 'point in time' archive to be stored offline.
PC Instructions
Creating the Archive (.pst) file
- Open your inbox and select File
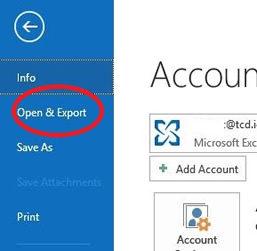
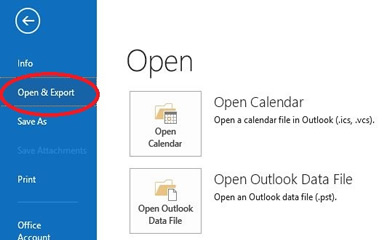
- Select Open & Export from the file menu
- Select Import/Export
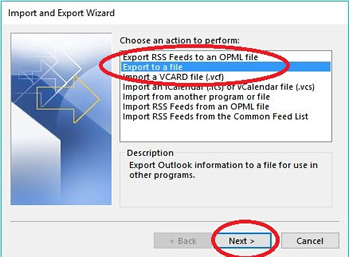
- You will now see the Import and Export Wizard, follow the steps as shown here.
- Select Export to a File and click Next
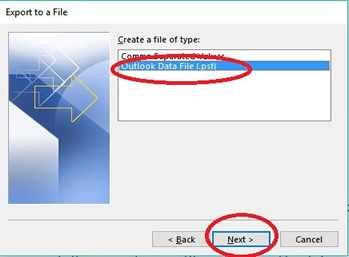
- Select Outlook Data File (.pst) and click Next
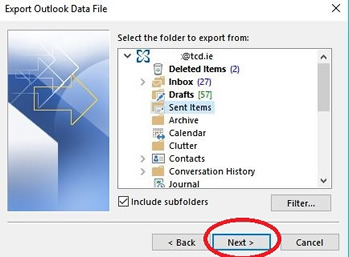
- Select the folder you wish to archive from
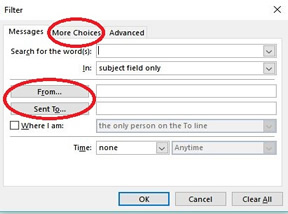
- If you wish to archive selected emails only select Filter and see the steps in the next section.
- If you are happy not to filter click Next
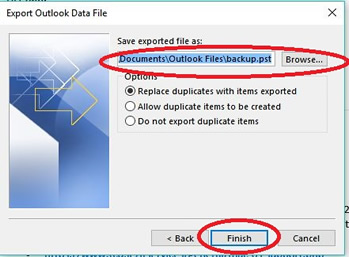
- Select the folder you wish to save your archive to / browse to another folder. and click Finish
- The default folder is a folder called Outlook Files in your Documents Folder
- Select Export to a File and click Next
- You will need to supply a password. Please keep record of this as you will need it to open the file.
- Please note IT Services will have no record of this password, you will not be able to open the file if you forget it.
- Your file will be available in the folder location you selected from the wizard
Filtering Options
You can use the filtering tool to specify certain messages only, for example
- By Sender or By Subject.
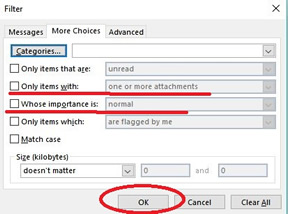
- Using the More Choices tab you can specify messages
- By Importance or With Attachments
- When you are happy with your filtering, click OK
Opening the Archive (.pst) file
When you require access to items in the .pst file you can import this to your Outlook Desktop client.
- Open your inbox and select File
- Select Open & Export from the file menu
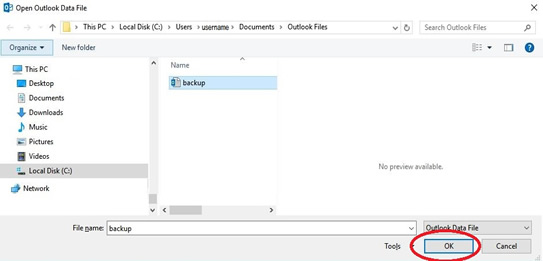
- Browse to your file and click OK
- Enter the password you created earlier, click OK
- The archive will now be available to you from your folders in Outlook.
macOS Instructions
Creating the Archive (.olm) file
- On the Tools tab, choose Export

Missing "Export" optionIf running Outlook for Mac in the 'New Outlook' mode, 'Export' is currently not an available option. To check if you are running in 'New Outlook' Mode, click 'Outlook' from the top toolbar. If 'New Outlook' has a tick beside it, then you are running this mode.

To use the 'Export' option, you must switch back to the 'Original' mode by untickting 'New Outlook'. Please note, switching Outlook for Mac back to 'Original' mode will restart Outlook and require you to set up your College account in Outlook again.
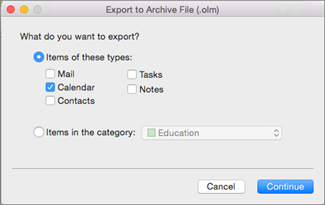
- In the Export to Archive File (.olm) box, check the items you want to export, and choose Continue
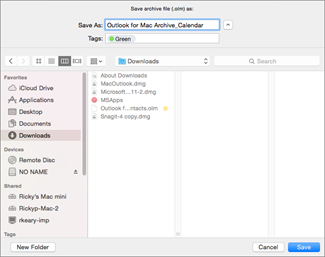
- In the Save As box, under Favourites, choose the Downloads folder, and click Save.
- Once your data has been exported, you'll get a notification and you'll choose Finish.
Opening the Archive file
When you require access to items in the file you can import this to your Outlook Desktop client.
- In Outlook, on the Tools tab, choose Import

Missing "Import" optionIf running Outlook for Mac in the 'New Outlook' mode, 'Import' is currently not an available option. To check if you are running in 'New Outlook' Mode, click 'Outlook' from the top toolbar. If 'New Outlook' has a tick beside it, then you are running this mode.

To use the 'Import' option, you must switch back to the 'Original' mode by untickting 'New Outlook'. Please note, switching Outlook for Mac back to 'Original' mode will restart Outlook and require you to set up your College account in Outlook again.
- In the Import box, select Outlook for Mac archive file (.olm)
or if you are importing a .pst file created on a Windows you can choose Outlook for Windows archive file (.pst). Click Continue
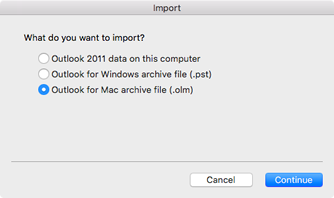
- Locate the file on your Mac, and then choose Import.
- When the import process is complete, choose Finish.
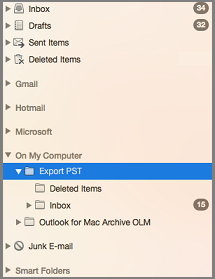
The imported items appear in the navigation pane under On My Computer.
